
Replacing the shocks on a 1998 Ford Ranger can improve your vehicle’s ride quality and handling. Here is a general guide on how to replace your 1998 Ford Ranger Shocks.
Please note! that this is a general overview, and specific steps may vary depending on the model & suspension setup of your Ranger.
Always consult, your vehicles manual and use proper safety precautions.
Tools and Materials You will Need:
- Jack and jack stands or a vehicle lift
- Lug wrench
- Wrench and socket set
- Breaker bar
- Torque-wrench
- Replacement shocks
- Penetrating oil (e.g., WD-40)
- Rubber-mallet
- Safety glasses & gloves
- Vehicle owner’s manual for specifications
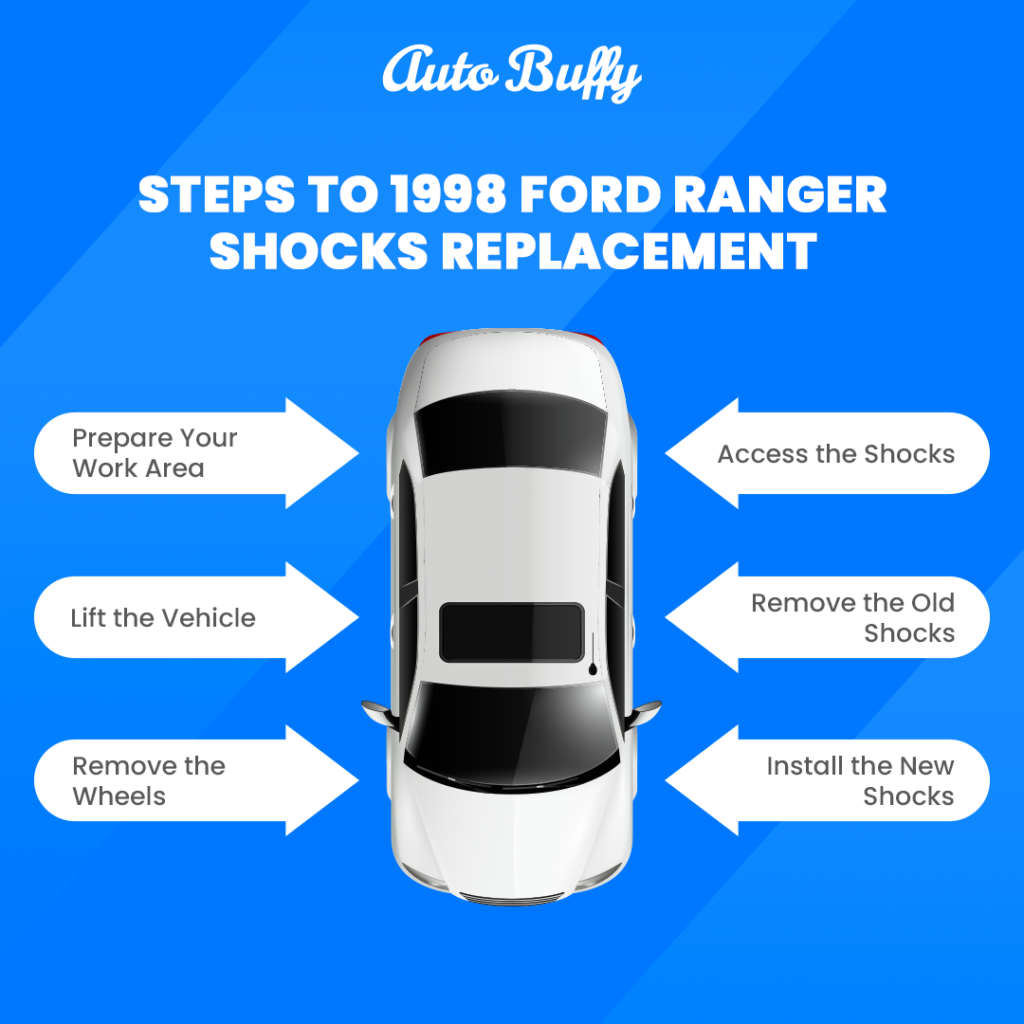
Steps to 1998 ford ranger shocks replacement:
Prepare Your Work Area:
- Park your Ranger on a level surface, and engage the parking brake.
- Ensure the vehicle is in gear or “Park” (if it is an automatic transmission).
- Put on safety glasses and gloves.
Lift the Vehicle:
- Use a jack to lift the rear or front of the vehicle depending, on which shocks you are replacing.
- Place jack stands under the vehicle for added safety.
Remove the Wheels:
- Use a lug wrench to loosen and remove the lug nuts from the wheel.
- Remove the wheel and set it aside. ( use 1998 ford ranger shocks replacement parts OEM)
Access the Shocks:
- Locate the shocks. On the rear of the Ranger they are usually mounted near the axle & connected to the frame. On the front they are typically attached to the suspension components.
- Spray penetrating oil on the shock’s upper and lower mounting bolts to help loosen them.
Remove the Old Shocks:
- Use a wrench and socket set or a breaker-bar to remove the upper and lower mounting bolts from the old shocks.
- If the bolts are corroded or difficult to remove use a rubber mallet to tap them gently while, turning to break them loose so you will be needed more 1998 Ford Ranger Shocks replacement parts.
Install the New Shocks:
- Install the new shocks, in the same orientation as the old ones. Follow the manufacturers instructions for the specific shocks you have.
- Hand-tighten the mounting bolts initially.
Torque the Mounting Bolts:
- Use a torque wrench to tighten the upper & lower mounting-bolts to the manufacturer’s recommended torque specifications. Refer to your owner’s manual or the instructions provided with your new shocks.
Reassemble the Wheel:
- Put the wheel-back onto the vehicle and hand-tighten the lug nuts.
- Lower the vehicle from the jack stands using the jack.
- Tighten the lug nuts in a crisscross-pattern to ensure even tightening.
Test Drive and Check:
- Take your Ranger for a test drive, to ensure the new shocks are working properly.
- Check for any unusual noises or handling issues.
Repeat for the Other Side (if applicable):
- If you are replacing both rear or front shocks repeat the above steps for the other side of the vehicle.
Replacing 1998 Ford Ranger Shocks can significantly improve your vehicle’s ride quality and handling. However, if you are not comfortable performing this task yourself it is advisable to have a professional mechanic do the job.
Leave a Reply